Metrology Glossary: Drift
What Is Drift?
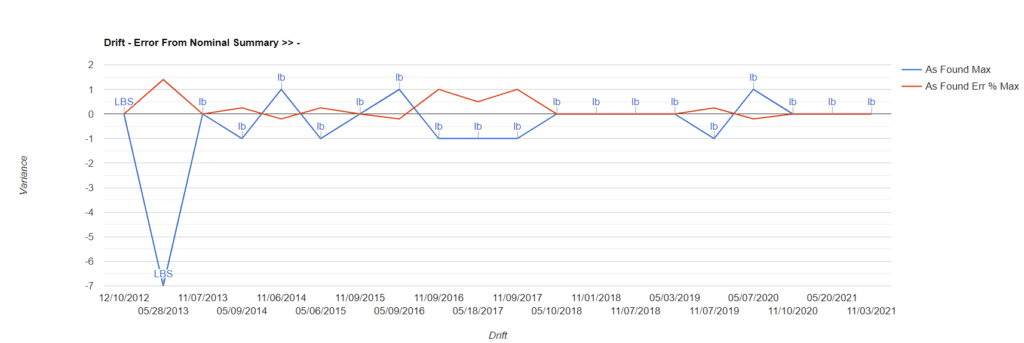
Drift refers to the incremental alteration in the precision of a measurement device over time. Several factors, including wear and tear, fluctuations in temperature, and environmental variables, can contribute to this phenomenon. Electronic scales, in particular, are susceptible to minute environmental shifts. Detecting drift involves employing a control chart methodology to monitor the measurements of three or more reference standards over time. If the measurements start diverging from the established values of these reference standards, it signifies that the instrument is experiencing drift. In the event of drift detection, it is necessary to perform calibration to correct the inaccuracies.
Why is Drift Important?
- Monitoring instrument performance over time: Assessing the reliability and accuracy of a device is facilitated by measuring its temporal drift. This evaluation aids in determining the optimal timing for instrument calibration or replacement.
- Predictive maintenance: Early detection of potential issues with a measurement device is achievable through monitoring drift patterns. By comprehending these patterns, one can proactively schedule preventative maintenance, preventing device failure.
- Improving measurement accuracy: Identifying and addressing the factors contributing to drift allows one to minimize their impact, resulting in enhanced accuracy and reliability of measurements.
- Quality control: Utilizing drift as a metric ensures that measurements consistently fall within acceptable tolerances. This is particularly crucial in industries where stringent quality control measures are required, such as pharmaceuticals and manufacturing.
- Calibration: Calibration can be informed by drift data. This data aids in determining the optimal calibration timing and assessing the effectiveness of calibration procedures over time.

Related Terms
Calibration error refers to the variation observed between the recorded output of a properly calibrated instrument and the factual measurement of the target quantity....
Accuracy is the extent to which a measurement aligns with the actual value of the quantity being assessed. It is commonly represented as a percentage relative to a standard reference....
Calibration involves the comparison of a measuring instrument with a known accurate standard to identify any discrepancies and make necessary adjustments....


