The Difference Between Roundness, Cylindricity, Coaxiality, Concentricity, Runout, and Total Runout
We have found that there is a fair amount of confusion regarding the differences between roundness, cylindricity, coaxiality, concentricity, runout and total runout. These are the GD&T parameters that control radial deviations on parts having a round cross section. To help you better understand the differences and how they relate to one another, we have broken down the terminology for you.
If you are already thinking that this seems like more information than you have time for, don’t worry! We know you are busy, and we are here to help! Cross has an experienced inspection team available to handle all of your measurement needs. Fill our our contact form to discuss your application with a Cross team member.
Metrology Terminology: What is Roundness?
Roundness, or circularity, is the 2D tolerance that controls how closely a cross-section of a cylinder, sphere, or cone is to a mathematically perfect circle. Consider a cylinder whose purpose is to roll along a flat surface. A small flat on the OD of the cylinder would detract from how smoothly the shaft can roll. The flat spot can even be so large that the shaft cannot roll at all. In this case the flat represents a deviation from a perfect circle that can be measured quite accurately. An example of a more complex roundness error is called lobing, which is an unintended form error from a centerless grinding operation. Roundness callouts on drawings have no reference to a datum, as roundness does not relate to the cross-section’s location on the part.
Metrology Terminology: What is Cylindricity?
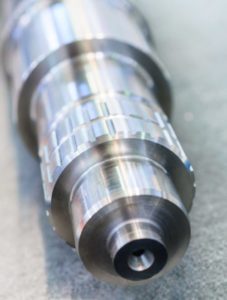
Cylindricity is the 3D version of roundness. It assesses how closely an object comes to a perfect cylinder, meaning that it is not only round, but also straight along its axis. The simplest example that demonstrates the need for cylindricity is a pin which is required to pass completely through a bore with a tight diametral tolerance. The pin may be inspected for diameter and found to be within tolerance. However, if the pin is bent, it may not pass through the bore. An assessment of cylindricity in conjunction with a diameter measurement would provide a more complete determination of the designer’s intent. Cylindricity measurements are intended for elements having the same diameter along the full length of the element.
Metrology Terminology: What is Coaxiality?
Coaxiality is the tolerance for how closely the axis of one cylinder is to another. Examples are a shaft having two diameters, or perhaps two bores located on opposite sides of a housing. In either case, the center of one element is expected to be along the same axis as the second element. Since each element is being assessed as an axis, coaxiality is a 3D measurement. A special case of coaxiality occurs when a part is measured at the same cross-sectional plane, making it a 2D measurement. This special case is called concentricity and the most common example is comparing the ID and OD relative to each other on a hollow shaft or tube. The engineering drawing will indicate which element is the measured surface and which is the datum surface.
Metrology Terminology: What is Runout?
Runout is a 2D measurement that can be either be taken in the axial direction or in the radial direction. When measuring in the radial direction, runout combines both roundness and concentricity errors into one composite measurement. If a part is perfectly round, the runout will equal the concentricity and if perfectly concentric the runout will equal the roundness error. Essentially, runout takes into account both the axis offset and the roundness of any object that rotates about an axis.
Metrology Terminology: What is Total Runout?
Total Runout is a 3D measurement which takes into account the entire surface of a part. Where runout measures only one cross-section relative to an axis, total runout takes the entire part into consideration, and all variations across the entire surface must fall within a specific tolerance.
Conclusion
We hope these descriptions of radial GD&T parameters are helpful to you. The actual measurement of these parameters can be quite complex. They require the proper selection of reference elements and filtering techniques, which help in interpreting the collected data. We encourage you to talk to our specialists for further information on these topics.
In fact, for almost any type of measurement you need, Cross is here to help! We sell and calibrate the equipment that you require for accurate repeatable measurements. If your team is too busy to measure your parts, or you need an impartial third party evaluation, we have the expertise and equipment to meet your needs. Our calibration labs are ISO 17025 accredited, following best practices and standards laid out by A2LA, NIST, ILAC, and more. Contact us today to learn more!
Want to share or download for later reading? Here’s a downloadable PDF copy of this article: Roundness, Cylindricity, Coaxiality, Concentricity, Runout, and Total Runout


