What is the Draeger-Tube System?
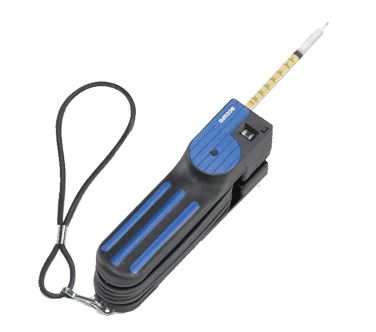
In order to optimize your gas detection results, you need a clear understanding of the Draeger Tube System. So, exactly what is a Draeger Tube System? The system contains two key parts that work in tandem. First, the Draeger Tubes are glass vials filled with a chemical reagent that reacts to a specific chemical range or family of chemicals. Second is the Draeger Accuro Pump, which draws a calibrated, repeatable 100 ml sample of air through the tube using the manual internal bellows pump. If the targeted chemical(s) is present the reagent in the tube changes color and the length of the color change typically indicates the measured concentration.
The Draeger Tube System is the world’s most popular form of gas detection! Why? There are three main reasons:
- Draeger Safety has made gas detection easy with the wide range of Draeger Tubes.
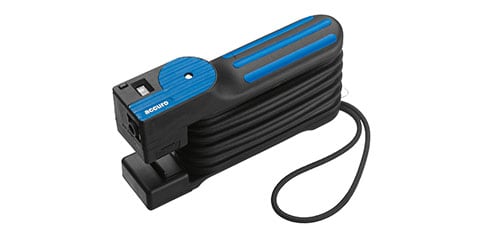
- The Draeger Accuro Pump is rugged and reliable.
- The ability to conduct gas measurements in nearly any accessible location.
Tips for Draeger Accuro Accurate Operation
Pump Leak Test
In order to draw the correct 100 ml sample of air through the Draeger Tube, the bellows pump must be at peak performance. Draeger has established a quick and easy field test to confirm the pump is in good working order. To perform the Pump Leak Test, simply insert an unopened Draeger Tube into the Socket. Squeeze pump completely and release. The pump is adequately leak-proof if the “end of stroke indicator” has not appeared after 15 minutes. Remove the tube, reset the counter to zero and you’re ready to start detection.
Reset Stroke Counter
Each Draeger Tube has a specific number of strokes required for an accurate measurement. This number is printed on each tube, ex: n=2. If you start a gas detection test without the counter set to zero, there is no guarantee that the correct number of strokes will be achieved. The reset button is recessed to prevent accidental resetting. You can use the tip of an un-opened Draeger Tube or small screwdriver to actuate the reset to zero.
Release Bellows Fully
In order for the full 100 ml air sample to pass through the detector tube, the bellows has to expand fully. Some of the Draeger Tubes have double stack tubes or the reagent could be very dense. In these cases, the bellows will take more time to complete the 100 ml draw cycle. Allow the bellows to expand fully and you’ll get the correct calibrated amount of sample air through the system.
Flush with Clean Air
After you have completed the detection tube cycle. Remove the used tube and flush the pump with a few strokes of clean air. This will allow the bellows to exhaust the cavity and be ready for the next detection. Also, remember to reset your stroke counter.
Tips for Draeger Accuro Pump Maintenance
When you deploy the Draeger Tube System, for portable gas detection, your Draeger Accuro Pump must be in spec and working correctly. The pump is as critical to accurate measurement as the Draeger Tube. Remember that the Draeger Accuro Pump draws a calibrated, repeatable 100 ml sample of air through the tube using the manual internal bellows pump.
If you conduct a leak test (as described above) and your indicator appears to actuate prior to the 15 minutes, then you need to perform maintenance. Below are the quick steps to repair your pump.
In the Draeger Accuro Pump Repair Kit you’ll find Authentic Draeger replacement parts for wear components of the Accuro 6400000 Pump including:
- Tube Socket
- Indicator Membrane
- Exhaust Valve Discs
Step 1: Replace the Exhaust Valve
- Unscrew bolt by using the hexagon screwdriver supplied.
- Lift off lower pump plate, e. g. by using a coin.
- Pull valve disc from its seating.
- Wipe valve seating with a damp cloth.
- Moisten the stem on a new valve disc and push it firmly into the center hole of the valve seat.
- Check correct seating by pulling on valve disc lightly.
- Reinstall lower pump plate and press it into place.
- Insert bolt again and screw down hand tight.
- Perform a successful leak test, as described above.
Step 2: Replace the Tube Socket
- Press spring hook down with a suitable tool (e. g. ball point pen).
- Take out cover plate. Cover plate holds End-of-Stroke Indicator assembly in place.
- Press spring flanges together and remove socket.
- Insert new socket. Move on to replace the membrane below.
Step 3: Replace The Membrane
- Using a new End-of-Stroke Indicator Membrane, place parts into the housing in the sequence illustrated on page 9 of the Pump Manual
- Observe appropriate position of the membrane and follower parts.
- Insert spring hook of cover plate and push on firmly.
- Perform a successful leak test, as described above.
Once these parts have been replaced and a successful leak test completed, you are ready to start gas detection measurements.
Properly operating and maintaining your pump will keep it in optimal working order. Contact our team to purchase a Draeger Tube Accuro Pump kit today!