Universal Robots have made implementing a robot far easier than it has been in the past. With intuitive programming, collaborative functionality, and high flexibility many companies that didn’t have the technical expertise to implement robots now have those abilities in-house. When it comes to adding a robot to production, one of the most challenging parts is often part presentation. Teaching the UR to go to a specific place and pick up a part is a breeze, but finding a cost-effective way to get that part into a repeatable position can often be the challenge.
You have many different options when it comes to part presentation. You can set up a magazine, you can have an operator load a fixture, and even have an operator stage multiple parts into a fixture that the robot can pick from. The downfall to these is that it often still requires at least some amount of operator involvement to keep enough parts in the system for the robot to function. If your parts lend themselves well to stacking, this may be your best option. To fixture a stack of parts into repeatable position can be much easier than creating multiple nests, or designing a magazine feed system. However, to run a standard robot program, you would need to count the parts you are placing in a stack so the robot could know it’s starting point for the top of the stack. This would, in turn, create more operator involvement because they would not only need to load the stack, but they would have to take the time to count the parts and make sure they have the correct amount. Fortunately, Universal Robots has you covered.
By utilizing the seek function within a Universal Robot, you don’t need to count the parts in the stack. You can simply place as many as you want/have, and the robot will seek down until it finds the top of the stack, and pick from the top of the stack.
We’ll walk you through the steps that it would take to make use of this tool. In the following example, I will be picking from a stack of parts and utilizing a part presence sensor incorporated into my end of arm tooling to locate the top of the stack.
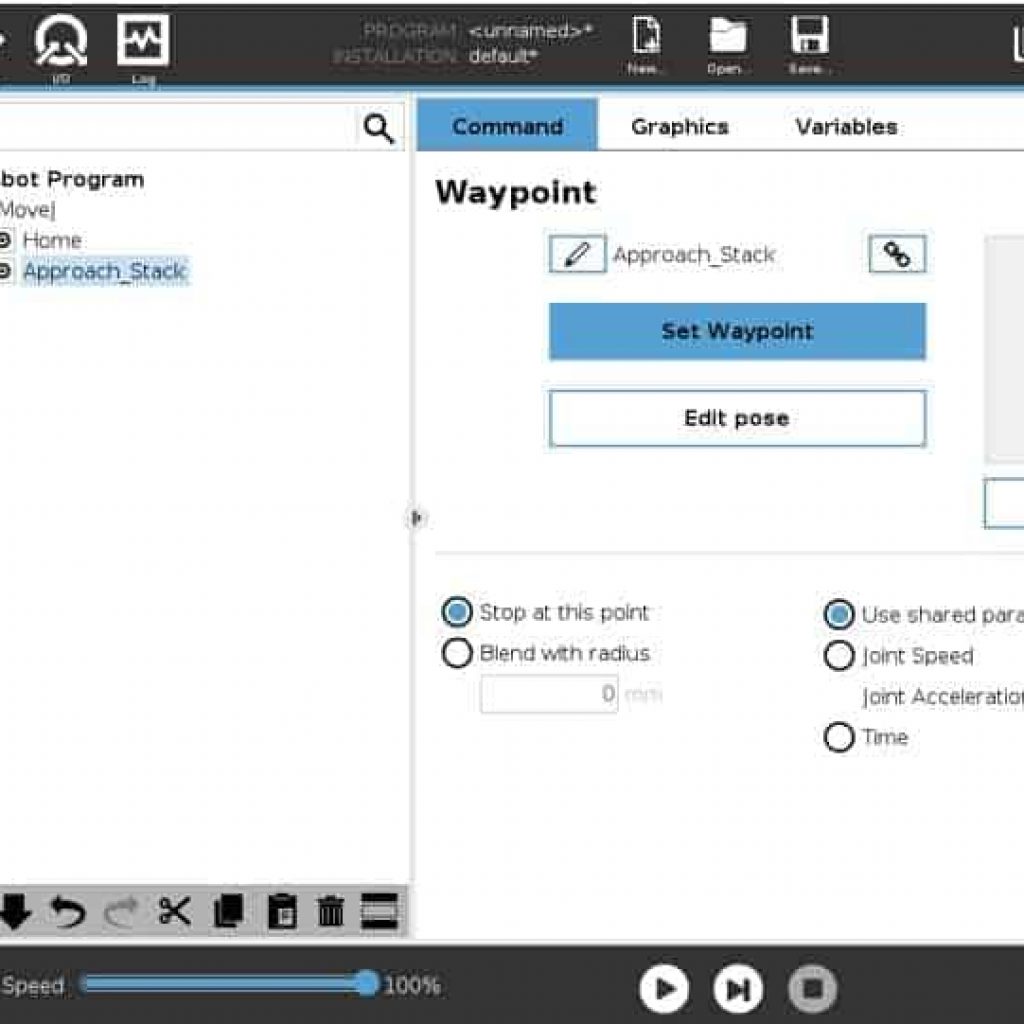
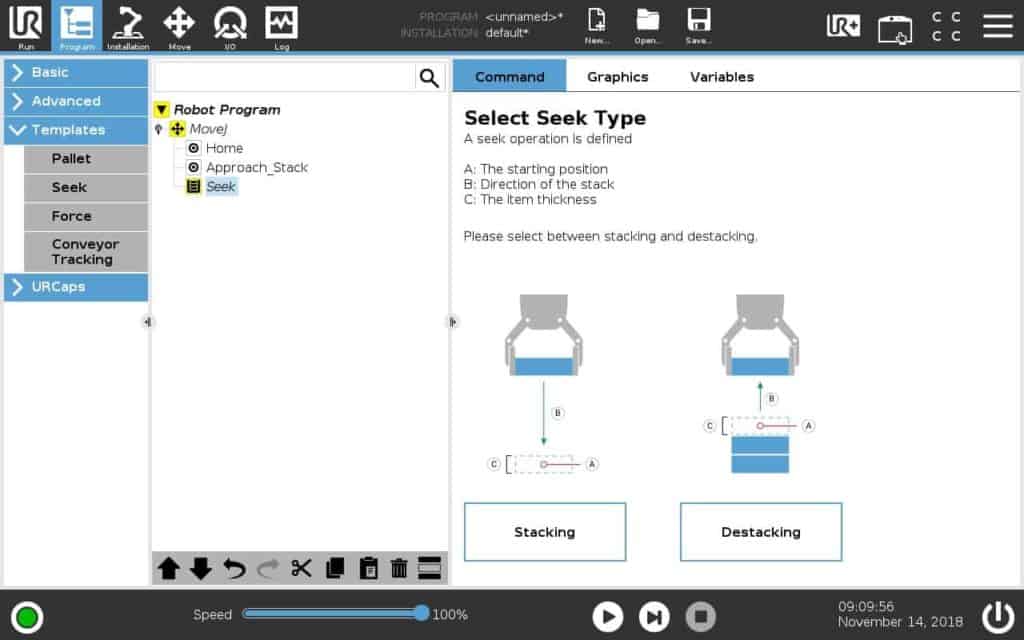
This will be the starting point for our robot program. As you can see in the image below, we have added our home position as well as an approach position for the stack. The next steps will be to select the drop down field “Templates” noted by the orange arrow, and then “Seek” noted by the green arrow. This will add the Seek template into our program.
Next, we need to select the Destacking option as we want to de-stack parts for the next stages in the process. A very similar and intuitive process would be carried out if you wanted to stack parts once your process has been completed.
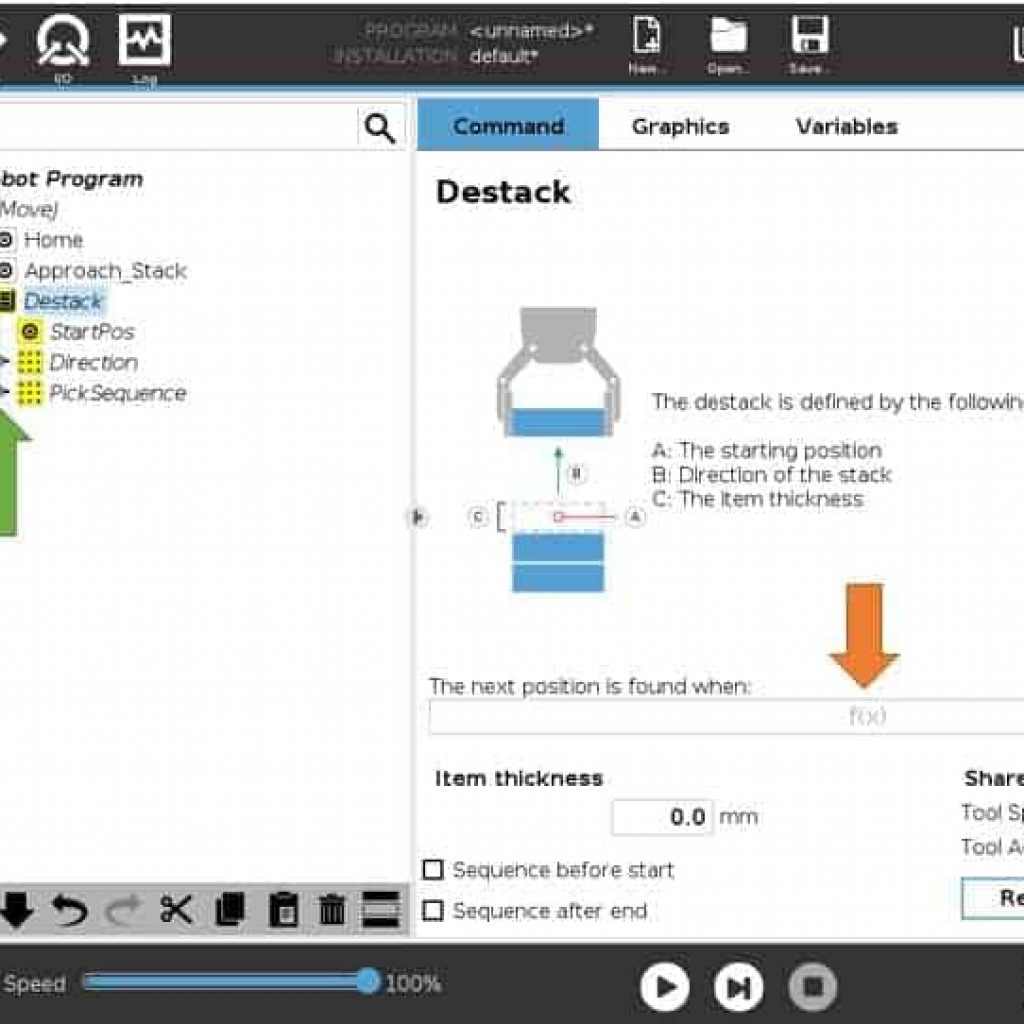
The next step is to set up our condition. However, we would recommend expanding the “Direction” and “PickSequence” nodes within our program tree first (noted by the green arrows). Then, click into the dialogue box to create the condition you will be looking for.
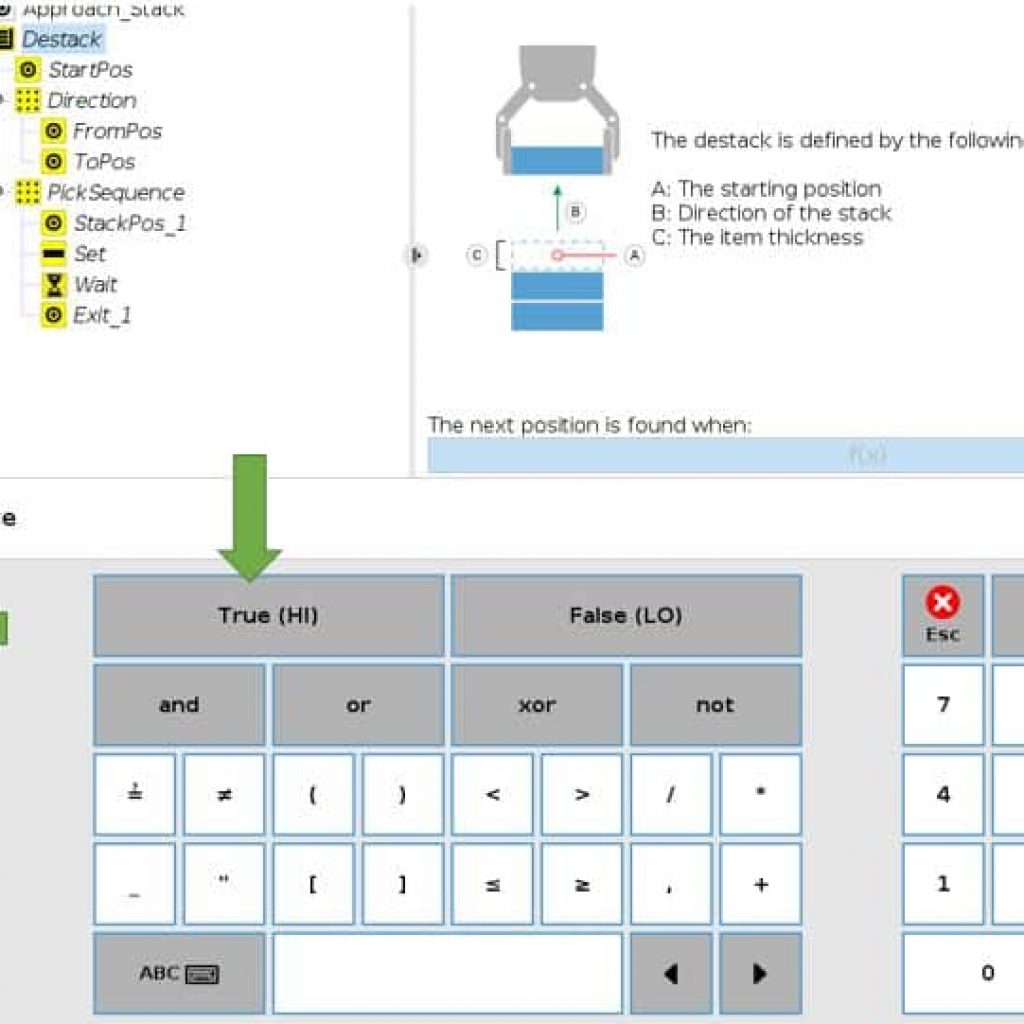
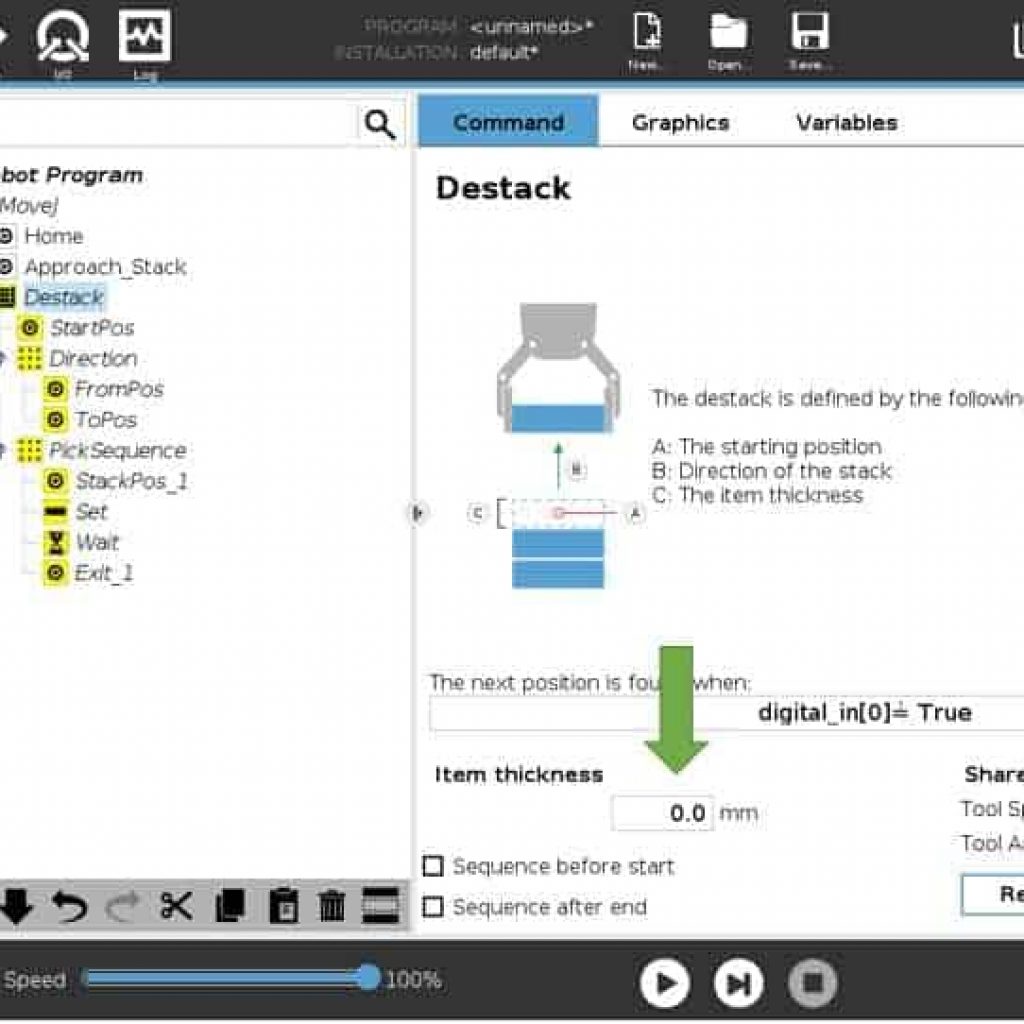
This will vary a bit for your application depending on how you wired in your sensor. In this case, we wired the part presence sensor of our EOAT into Digital Input [0], so we need to tell the de-stacking template to look for Digital Output [0] to equal True (HI). Once complete, click submit to store the condition.
Once you submit your condition, you will need to input your item thickness here. This will be used in the background of your robot program to help speed up the seek process. Once an item has been picked, the robot will quickly move to the next anticipated stack position before beginning the seek function.
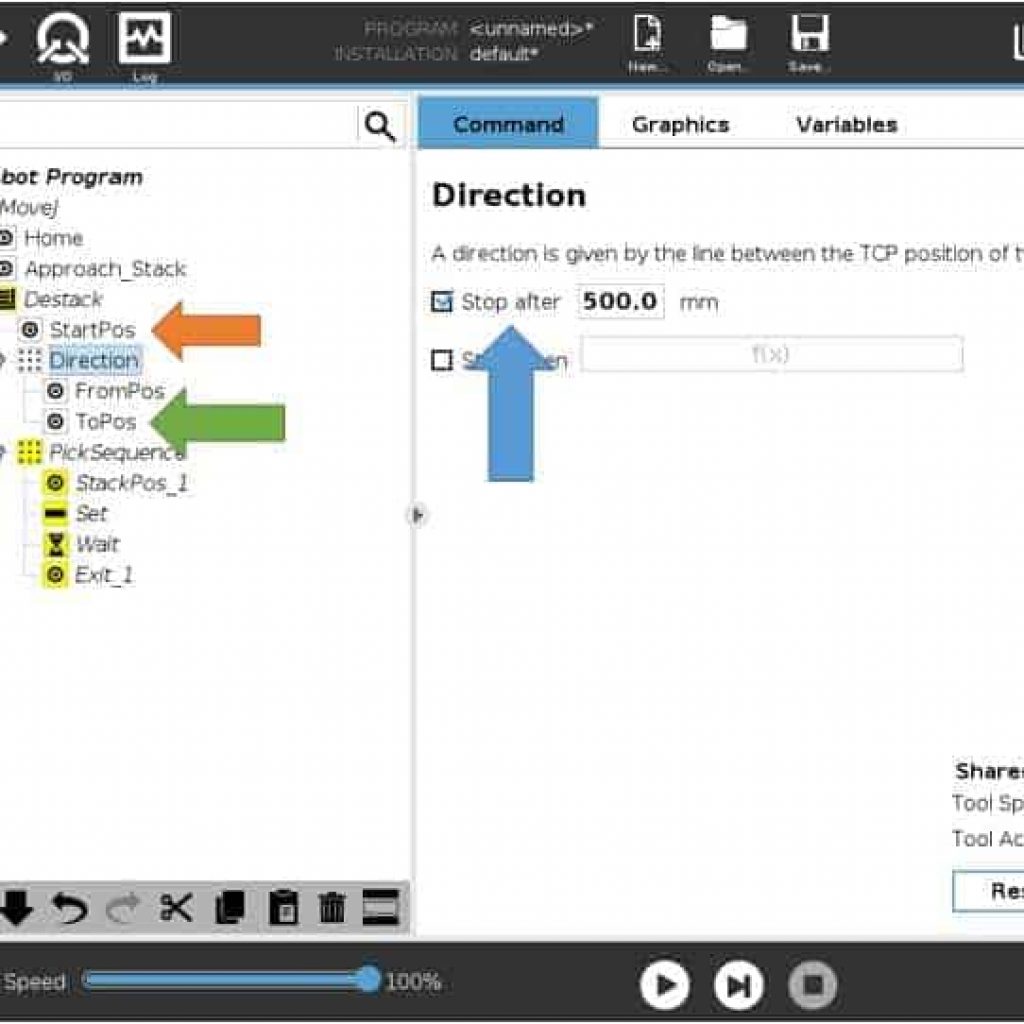
The next part of the programming will involve teaching three waypoints. The start position waypoint (noted by orange arrow) will be the position from which the robot will begin the seek function. The from position and to position will dictate the direction of travel that will occur during the seek. Our recommendation is to teach the from position as the highest possible point for the stack, and teach the to position as the bottom part in the stack. This method will result in the robot calculating the “stop after” distance for you automatically, and prevent you from running your end effector into the table. You will need to check the box to select this method (highlighted by the blue arrow).
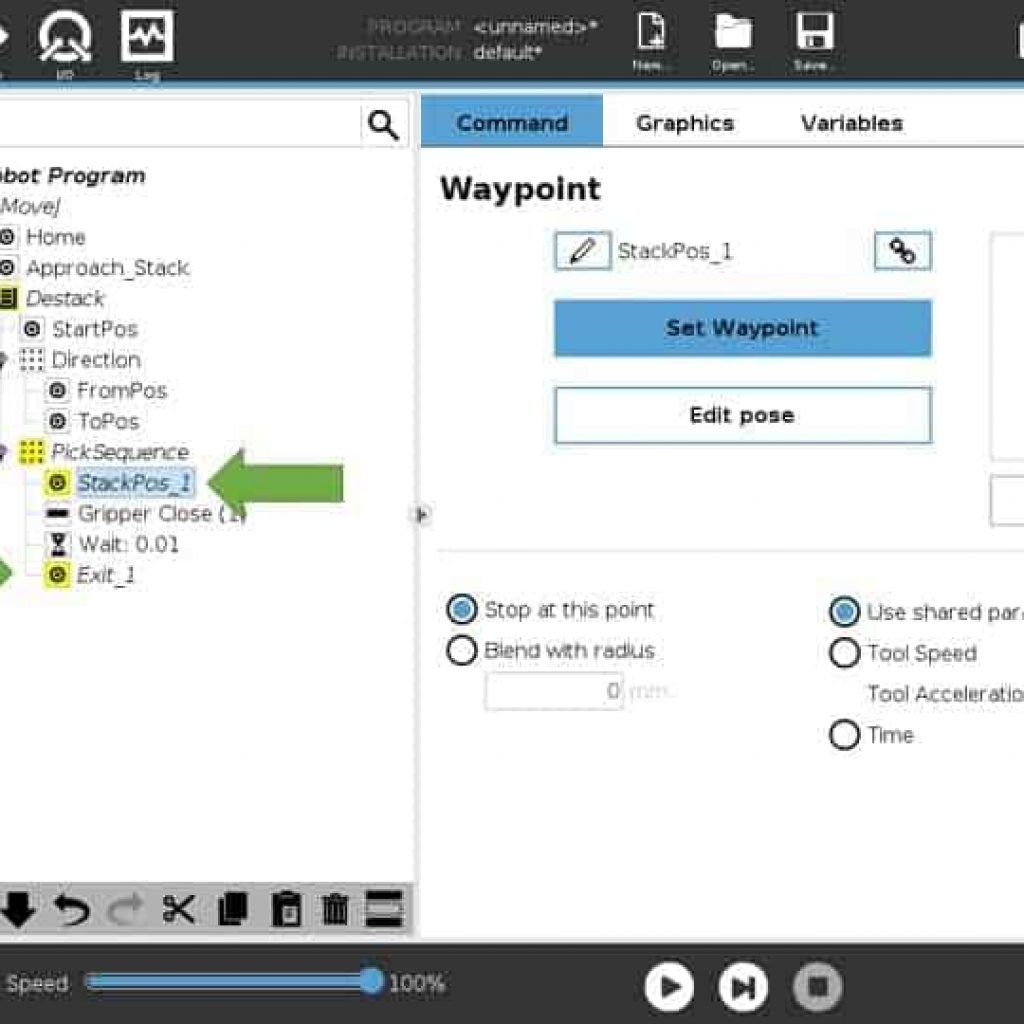
Next, you will need to teach “StackPOS_1” and your exit position. Stack position one will be the first anticipated pick location of your stack, however if the stack presented is lower than what is taught, the robot will seek until it finds the first part. The key and reason for teaching “StackPos_1” is that the robot needs a point of reference for the exit position. Once you have taught “StackPos_1”, the exit point will be in reference to that position. So when teaching the exit point, move high enough or in the correct direction to clear any fixturing you have put in place for the stack. The exit point will then be translated to each subsequent pick within the stack.
For example, if the exit point was taught 50mm above “StackPos_1”, each pick location within the stack will have an exit point 50mm above the pick location. Once this is complete, you will need to set your gripper command to actuate the gripper. In this case, We are using a Robotiq gripper, so we have inserted the command to close that gripper. If you are using vacuum or a pneumatic gripper, you would have a “set” command and select the appropriate output required. At this point, you have completed the de-stacking template.
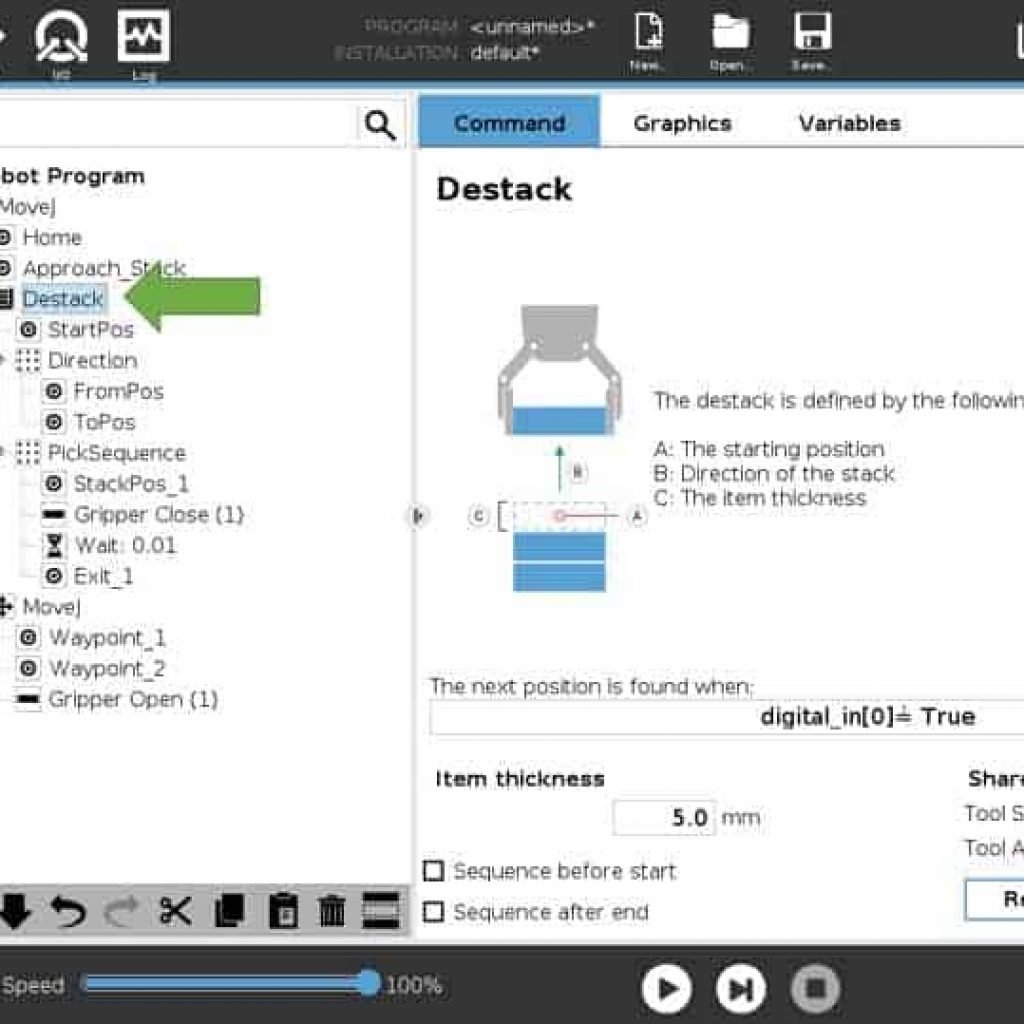
From here, we now need to tell the robot what to do with the part that we have picked from our stack. An important note, be sure to highlight the “Destack” node (green arrow) within your program prior to inserting anything that is to occur after the de-stack portion of your program. As you can see beside the orange arrow, my next move command is no longer within the hierarchy of the de-stack template. This is very important because at this point, we no longer want the path we create to be relative to the de-stacking template. In this scenario, the place locations will be the same (i.e. within a machine we are loading). If you do not escape the hierarchy prior to programming the next steps, the waypoints will remain relative to the pick location of the stack. It is simple, but a note worth mentioning.
Whether you are tending a machine, palletizing, or any other application part presentation for the robot is a key component to any robotic system. Hopefully, this has provided another tool for you to use when considering potential solutions. Incorporating this tool will help limit operator involvement to provide a better ROI, as well as reduce the coding required to save time and get your system running faster.
If you have any questions, Cross Robotics will be more than happy to help! Fill out our contact form and we’ll had an expert get in touch as soon as we can!