LK Metrology Case Study: Rapid Inspection of Large, Tight-Tolerance Components

Supplier Resource

Overview

LK Metrology Case Study: Rapid Inspection of Large, Tight-Tolerance Components 2
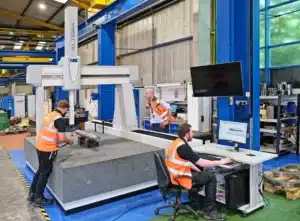
The LK Altera M 30.15.10 on the shop floor at CMS Cepcor’s manufacturing facility in Coalville.

LK Metrology has revolutionized the inspection of large, tight-tolerance components with their advanced coordinate measuring machines (CMMs). The company’s innovative solutions enable rapid and precise measurement, significantly reducing inspection times while maintaining high accuracy. This advancement is particularly beneficial for industries such as aerospace and automotive, where the demand for precision and efficiency is paramount. For example, CMS Cepcor, a leading supplier of aftermarket crusher spares and equipment to global industries, enhanced its quality control with the acquisition of an Altera M coordinate measuring machine from LK Metrology. Learn more about how CMS Cepcor was able to streamline their process in this case study from LK Metrology: Rapid inspection of large, tight-tolerance components. By integrating cutting-edge technology and user-friendly software, LK Metrology CMMs ensure that manufacturers like CMS Cepcor can meet stringent quality standards and improve overall productivity. 

At Cross Company, our precision measurement team has extensive expertise in implementing equipment like LK Metrology CMMs into a wide range of applications across many industries. Whether you are in aerospace, automotive, or any other sector requiring high-precision measurements, our team is ready to help you achieve the highest standards of quality and efficiency. As a distributor for LK Metrology in the U.S. the precision measurement group at Cross Company offers LK Metrology CMMs throughout our territories and our sales teams can work with your team to determine the best measurement solution for your process. Learn more and schedule a demonstration today!

See How A Solution From LK Metrology Can Benefit Your Operation

Latest Cross Company Updates

The new series of Quantim® QMC Coriolis flow meters and controllers from Brooks Instrument aims to achieve precise and consistent measurement and control of low flow rates of liquid or gas.
October 1, 2025
Looking to replace an Optical Comparator? 5 Reasons why the C-Vision is the right choice
October 1, 2025
Glass coating manufacturers must ensure reliable gas flow and low-pressure control for high-yield low-e glass production. Read this Brooks Instrument application note to learn how.
September 29, 2025
The new pressure/vacuum valve & flame arrester combination unit from Cross partner Groth Corporation helps protect tanks from damage created by overpressure or excessive vacuum, at the same time it provides protection from externally caused sources of heat and ignition.
September 25, 2025

Contact our Team

Hang Tight! We're Searching... Searching... Searching...

We’re looking through thousands of pages to find the most relevant information.

In the meantime, enjoy these fun facts…

Did you know… Cross Company is an ESOP (Employee Stock Ownership Plan). Our ESOP started in 1979 and as of 2006, we are 100% employee-owned! Learn more about our ESOP and how that benefits both team members and our customers.
Did you know... the precision measurement group at Cross was founded in 1939 by our current CEO's grandfather, Jim King. That's a whole lot of calibration!
Did you know... A fingerprint weighs about 50 micrograms. We know, we weighed it! The residue left from a finger can actually make a difference in weight results which is why we wear gloves when we calibrate weights. For reference, a sheet of paper is about 4.5 grams, that’s 4.5 million micrograms.
Did you know… Cross Company has grown significantly since our start in 1954. Over the years we've acquired 26 companies! Today, our five groups have expertise in everything from industrial automation to precision measurement, and industry knowledge going all the way back to 1939.