Overcoming Low-Contrast Challenges in Aerospace Components

Overcoming Low-Contrast Challenges in Aerospace Components 1
Overcoming Low-Contrast Challenges in Aerospace Components 2

Aerospace components frequently feature specialized surfaces like polished metals, optical glass, or mirror-like coatings. These characteristics often create low or non-existent contrast, which makes standard dimensional measurement tools struggle to acquire reliable data. For manufacturers working with critical components, this lack of contrast can severely compromise the accuracy and repeatability needed for quality assurance.

Fortunately, Cross partner OGP solves this precision problem with specific accessories designed for their M-Series systems. By introducing specialized tools, OGP ensures that even the most challenging materials can be accurately analyzed, providing the high-fidelity data required in the aerospace industry.

How OGP Solves the Precision Problem
Two key M-Series accessories from OGP are instrumental in reliably measuring these complex surfaces:

  • The OGP Grid Projector: This device projects a distinct pattern onto challenging, low-contrast surfaces. This projection allows the autofocus routine of the M-Series system to reliably bypass the material’s reflective or transparent properties, enabling the system to establish a clear focal point.
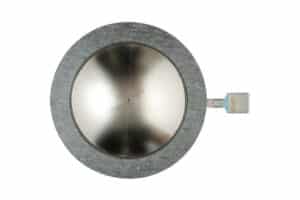
  • The TeleStar Probe: This innovative probe provides sub-micron resolution with an impressive 70 mm working distance. This generous working distance is critical for safely measuring complex parts and delicate structures without risking contact or damage.

By combining these technologies, the M-Series can accurately analyze these difficult surfaces, guaranteeing the necessary high-fidelity data and significantly improving repeatability for critical components where quality cannot be compromised.

Choosing the right distributor is just as important as choosing the right equipment. Cross Company is the ideal partner for implementing OGP products, including the M-Series and its specialized accessories. Our team doesn’t just sell technology; we offer deep application expertise, certified training, and long-term technical support. We work with you to ensure these advanced measurement solutions are perfectly integrated into your specific quality processes, maximizing performance and accelerating your path to reliable, repeatable precision measurement, especially for the most challenging components.

Videos

See How a Precision Measurement Solution from OGP Can Benefit Your Operation

Latest Cross Company Updates

The AW-Lake TG Series Gas Turbine Flow Meter is a robust solution for engineers and plant managers seeking reliable data in even the most challenging environments.
December 3, 2025
As the temperatures are dropping, ensuring your equipment is ready for the cold is crucial. That’s why, this month, Cross Company is highlighting Parker Quick Couplings.
December 1, 2025
Save on Lynx EVO and Swift PRO Elite, Cam or DUO with the Vision Engineering Year End Sale
November 20, 2025
Cross Company’s Hose and Fittings Group is proud to accept the Silver Flagship Award from the Parker Tube Fittings Division
November 12, 2025
This Enidine case study shows how a designer of high-speed material handling equipment for mail sorting used an innovative safety solution for a new overhead crane-like system.
November 12, 2025
s exclusive distributors of the OGP line of precision measurement equipment, we can help you specify, install, program and train on their products so you can be as efficient as possible with your dimensional measurements without compromising on accuracy.
November 6, 2025

Contact our Team

Hang Tight! We're Searching... Searching... Searching...

We’re looking through thousands of pages to find the most relevant information.

In the meantime, enjoy these fun facts…

Did you know… Cross Company is an ESOP (Employee Stock Ownership Plan). Our ESOP started in 1979 and as of 2006, we are 100% employee-owned! Learn more about our ESOP and how that benefits both team members and our customers.
Did you know... the precision measurement group at Cross was founded in 1939 by our current CEO's grandfather, Jim King. That's a whole lot of calibration!
Did you know... A fingerprint weighs about 50 micrograms. We know, we weighed it! The residue left from a finger can actually make a difference in weight results which is why we wear gloves when we calibrate weights. For reference, a sheet of paper is about 4.5 grams, that’s 4.5 million micrograms.
Did you know… Cross Company has grown significantly since our start in 1954. Over the years we've acquired 26 companies! Today, our five groups have expertise in everything from industrial automation to precision measurement, and industry knowledge going all the way back to 1939.